5 minutes WIF: Make your ASP.NET application use test-STS
Windows Identity Foundation (WIF) provides us with simple and dummy STS application we can use to develop our system with no actual STS in place. In this posting I will show you how to add STS support to your existing application and how to generate dummy application that plays you real STS.
Word of caution! Although it is relatively easy to build your own STS using WIF tools I don’t recommend you to build it. Identity providers must be highly secure and stable in every means and this makes development of your own STS very complex task. If it is possible then use some known STS solution.
I suppose you have WIF and WIF SDK installed on your development machine. If you don’t then here are the links to download pages:
Adding STS support to your web application
Suppose you have web application and you want to externalize authentication so your application is able to detect users, send unauthenticated users to login and work in other terms exactly like it worked before. WIF tools provide you with all you need.
1. Click on your web application project and select “Add STS reference…” from context menu to start adding or updating STS settings for web application.
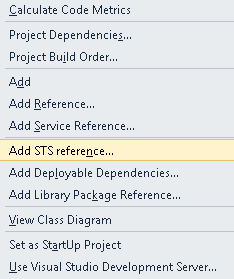
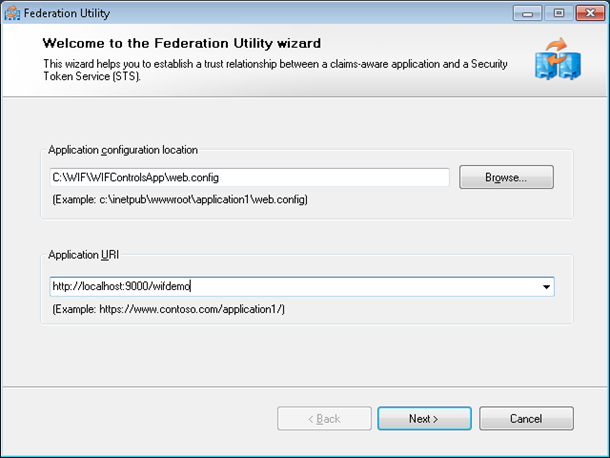
2. Insert your application URI in application settings window. Note that web.config file is already selected for you. I inserted URI that corresponds to my web application address under IIS Express. This URI must exist (later) because otherwise you cannot use dummy STS service.
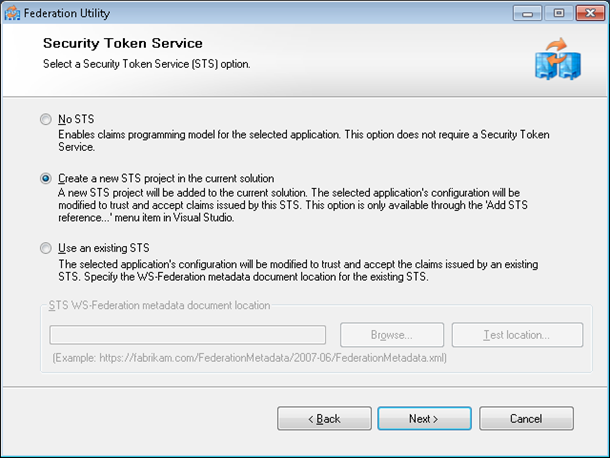
3. Select “Create a new STS project in the current solution” and click Next button.
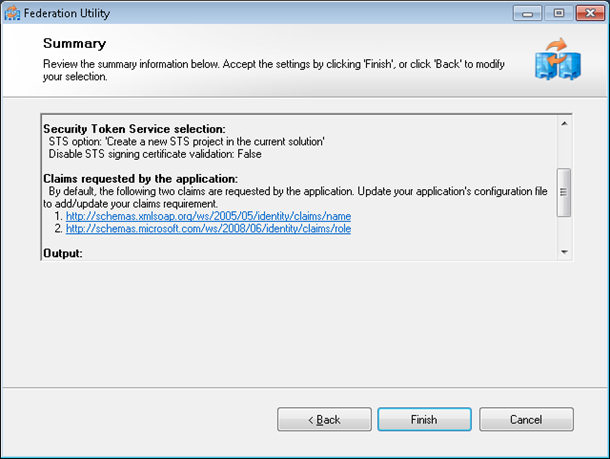
4. Summary screen gives you information about how your site will use STS. You can run this wizard always when you have to modify STS parameters. Click Finish.
If everything goes like expected then new web site will be added to your solution and it is named as YourWebAppName_STS.
Dummy STS application
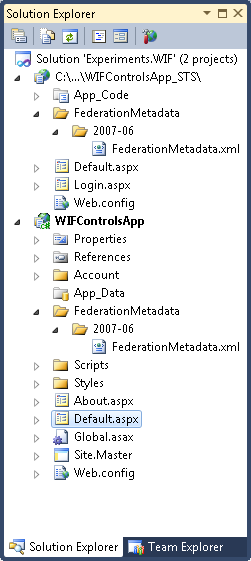
Why dummy STS?
Some points about dummy STS web site:
- Dummy STS is not template for your own custom STS identity provider.
- Dummy STS is very good and simple replacement of real STS so you have more flexible development environment and you don’t have to authenticate yourself in real service.
- Of course, you can modify dummy STS web site to mimic some behavior of your real STS.
Pages in dummy STS
Dummy STS has two pages – Login.aspx and Default.aspx. Default.aspx is the page that handles requests to STS service.
Login.aspx is the page where authentication takes place. Dummy STS authenticates users using FBA. You can insert whatever username you like and dummy STS still works.
You can take a look at the code behind these pages to get some idea about how this dummy service is built up. But again – this service is there to simplify your life as developer.
Authenticating users using dummy STS
If you are using development web server that ships with Visual Studio 2010 I suggest you to switch over to IIS or IIS Express and make some more configuration changes as described in my previous posting Making WIF local STS to work with your ASP.NET application. When you are done with these little modifications you are ready to run your application and see how authentication works.
If everything is okay then you are redirected to dummy STS login page when running your web application. Adam Carter is provided as username by default.
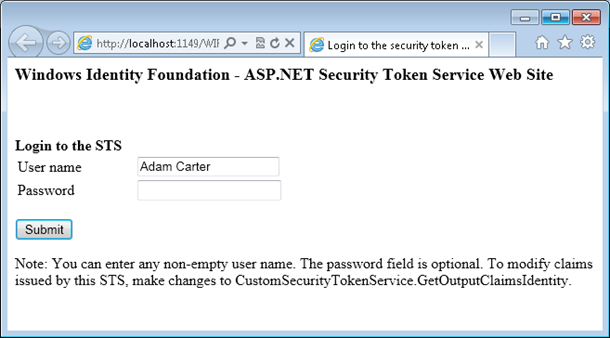
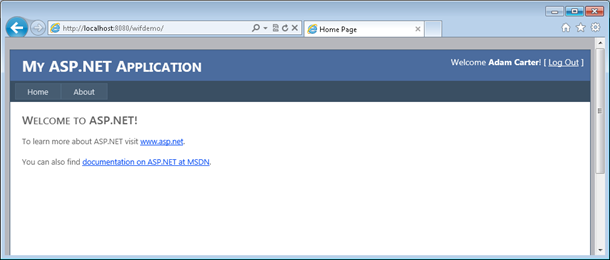
If you click on submit button you are authenticated and redirected to application page. In my case it looks like this.
Conclusion
As you saw it is very easy to set up your own dummy STS web site for testing purposes. You coded nothing. You just ran wizard, inserted some data, modified configuration a little bit and you were done. Later, when your application goes to production you can run again this STS configuration utility and it generates correct settings for your real STS service automatically.


