Getting started with Jekyll blog hosted on Azure static website
Building fully static web sites and blogs is possible anno domini 2019 and I tried out how it works using Jekyll and Azure services. My goal as a tech guy was keeping things small and automate as much as possible. After few days of experimenting I came out with beast solution described here.
- Getting started with Jekyll blog hosted on Azure static website
- Setting up Azure storage static website for Jekyll
- Azure DevOps build pipeline for Jekyll
- Azure DevOps release pipeline for Jekyll
- Taking Jekyll static blog live with Azure CDN and custom domain
Live demo and source are available! Live demo of Jekyll static blog is here: https://jekyll.gunnarpeipman.com. Source code with sample content is available at my Github repository gpeipman/JekyllBlog.
Why static blog?
One may want to ask why we should abandon all dynamics and convenience of popular CMS like WordPress and go with such a ancient thing as static site? Well, there are multiple reasons.
- Performance – no complex needs on web server
- Security – no server-side scripts and executables
- Serving just files – one task, easier to scale
- Summing up – cheaper to host
Here is screenshot of sample Jekyll blog analyzis in PageSpeed Insights service. For those who don’t know this service the result is excellent.

NB! This benchmark measures also loading times of all JavaScripts and stylesheets on page. Mobile score is usually way lower than desktop one and the result above is super good considering that we made no optimizations yet.
How it compares to WordPress?
Compared to WordPress there are losses in out-of-box functionalities. Changing URL structure is supported on WordPress very fancy way – old URL-s are held and when requested redirect is made to new URL of page. Building AMP page on WordPress is just a matter of installing few plugins but with static site we have to write all markup by ourselves. Static site with Jekyll is not so powerful but it is powerful enough to support professional blogging.
One may want to ask about programmed functionalities that pure static HTML doesn’t carry out. Let’s say commenting. Well, there are services like Disqus that bring secure commenting to your static blog. All you have to do is put piece of JavaScript to post layout page. Using JavaScript it is possible to extend static blog even more. We can use external services or build our own on Azure Functions by example.
What we are building?
Our goal in this post is to put a system for building and publishing static blog, same time keeping things on technical and writing side as minimal as possible. Write new post, push it to Git and see it live after few minutes.
Steps in publishing flow are following:
- Write – write your posts using your favorite markdown and HTML editor. I found myself convenient with Visual Studio code.
- Commit – commit your posts to Git repository when ready. I’m using Azure DevOps Git repository for this post.
- Build – commit triggers Azure DevOps build pipeline. All content is cloned, built using Jekyll running on Ruby virtual machine and copied to build artifacts folder.
- Publish – build triggers release pipeline that takes files from artifacts folder and copies these to Azure storage static website using Azure CLI.
- Host – fully static site is available on Azure storage static website and available for visitors.
For short, on local machine we are running just text editor and Git client. All dirty work is done on Azure DevOps.
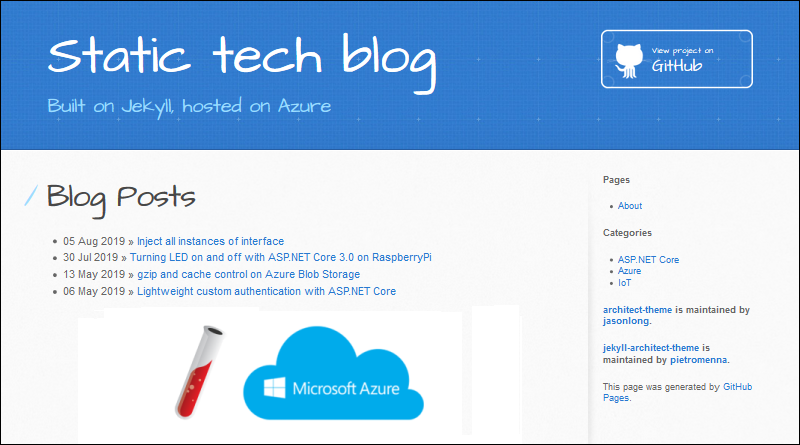
This is how our end result looks like on Azure storage website.
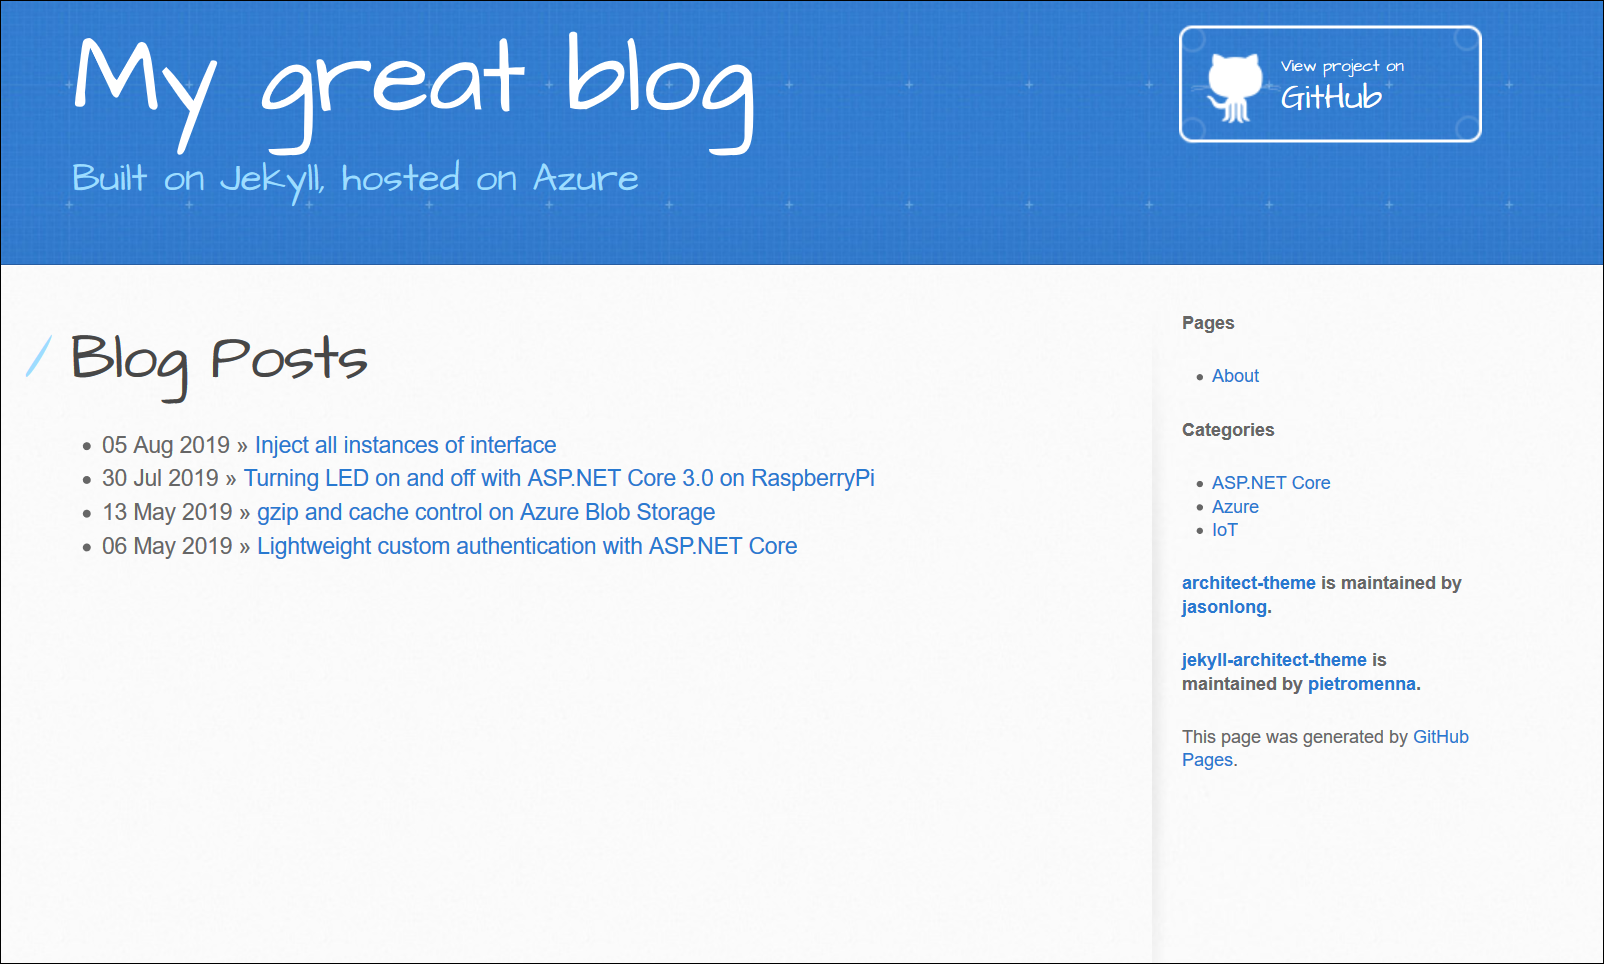
Front page of sample static blog
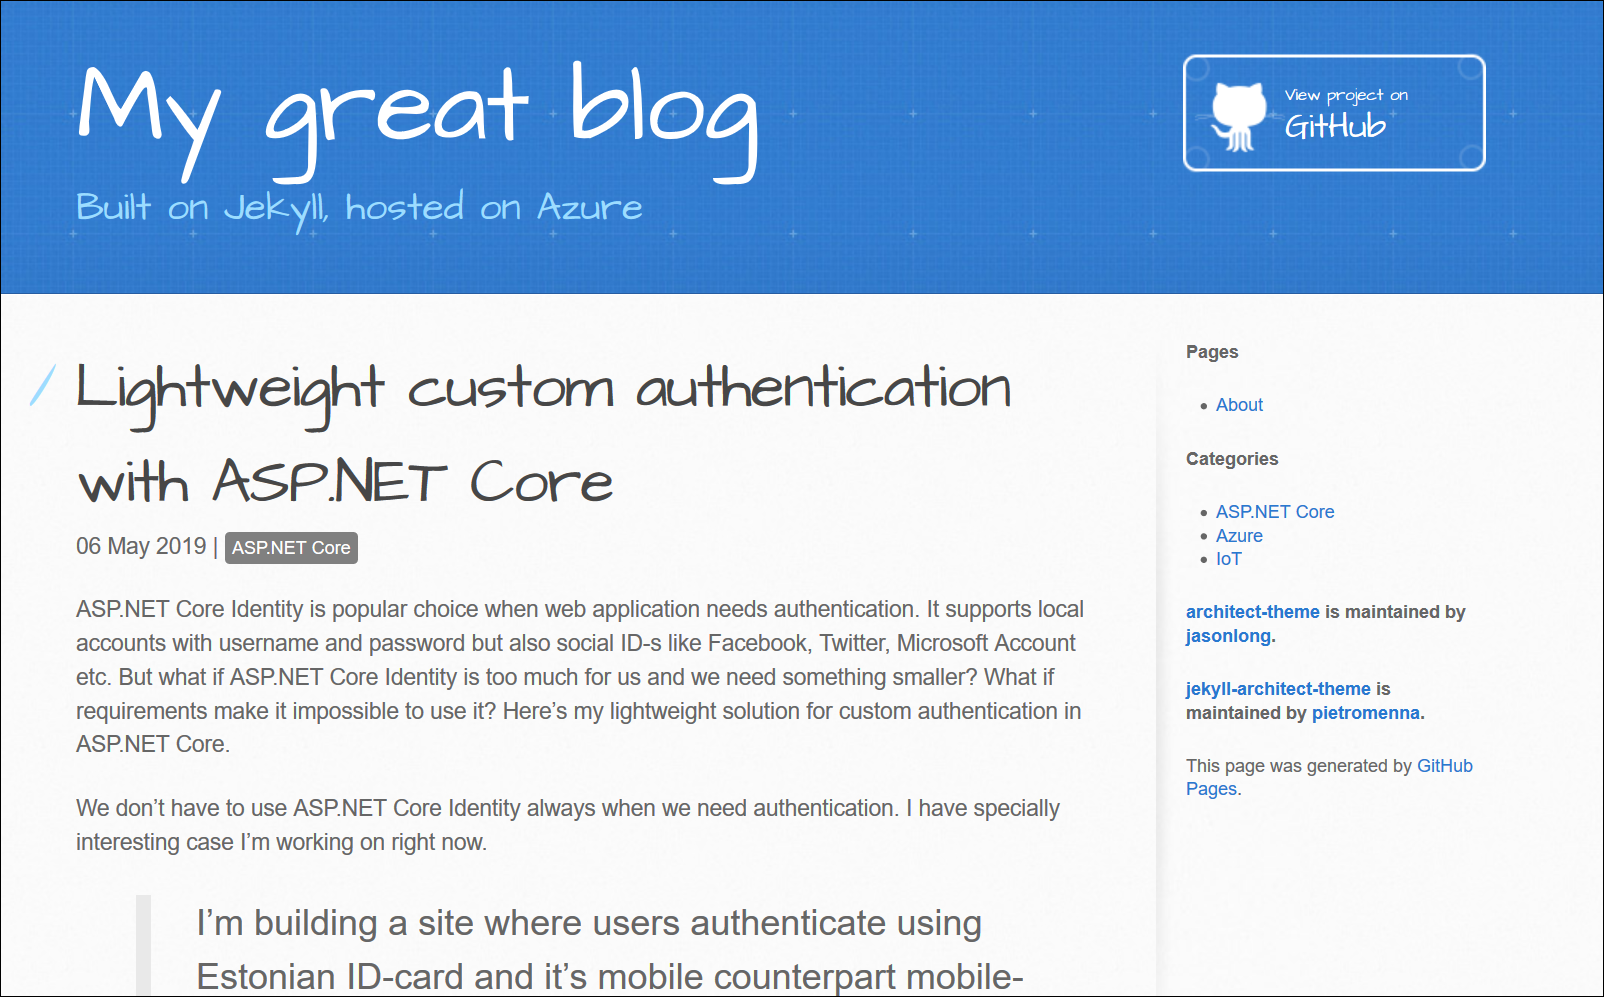
One blog post of sample static blog
Tools and services
This series of posts expect you to have the following tools and services:
- Visual Studio Code (works on Mac and Linux too)
- Windows git client
- Azure subscription (free with coupon and while in trial)
- Azure DevOps (free) account
- Ruby 2.5 or newer (full install)
- Jekyll (free)
- Azure Storage Explorer (free)
Git based publishing
I think most of my readers know about versioned content in WordPress or some other popular content management system (CMS). But the idea to use Git for versioning and publishing is new for many guys in industry.
Why should one consider Git as content store? Experienced bloggers and content managers work usually on multiple writings in parallel. This is also what I am doing. Some writings are small piece of work, some other writings (like this one) takes few evening or days to write. So, there’s always some content that waits finishing while smaller writing get done and published.
What we can do on Git is using branches for drafts. When writing is done we have to merge draft branch to master, push changes and wait until new version of site is published.
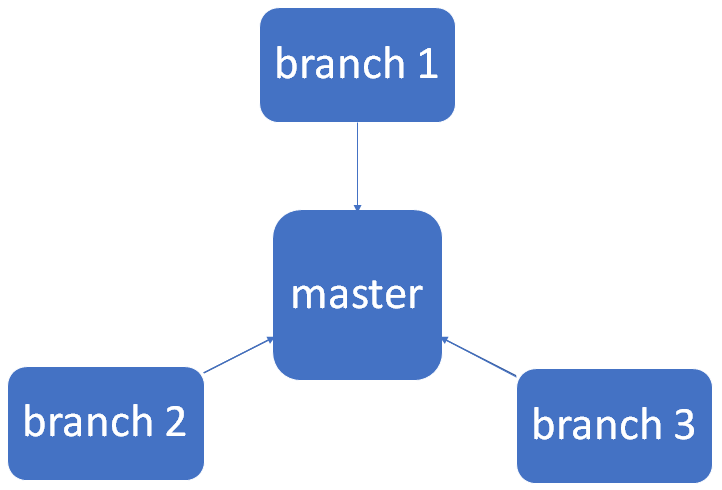
This is something that tech bloggers will love. I’m using free Git for Windows as it is anyway installed on my machine.
What is Jekyll?
Jekyll is Ruby script for building static web sites from simple HTML and markdown content using templates and add-ons. The surface we see is extremely light – we practically have static templates and content files that define for Jekyll how our site is built up.
Jekyll comes with small web server so we can build site and see changes in real time if we decide to run Jekyll in local box. In the beginning it’s good idea to have Jekyll running locally as we make a lot of modifications we want to see in browser.
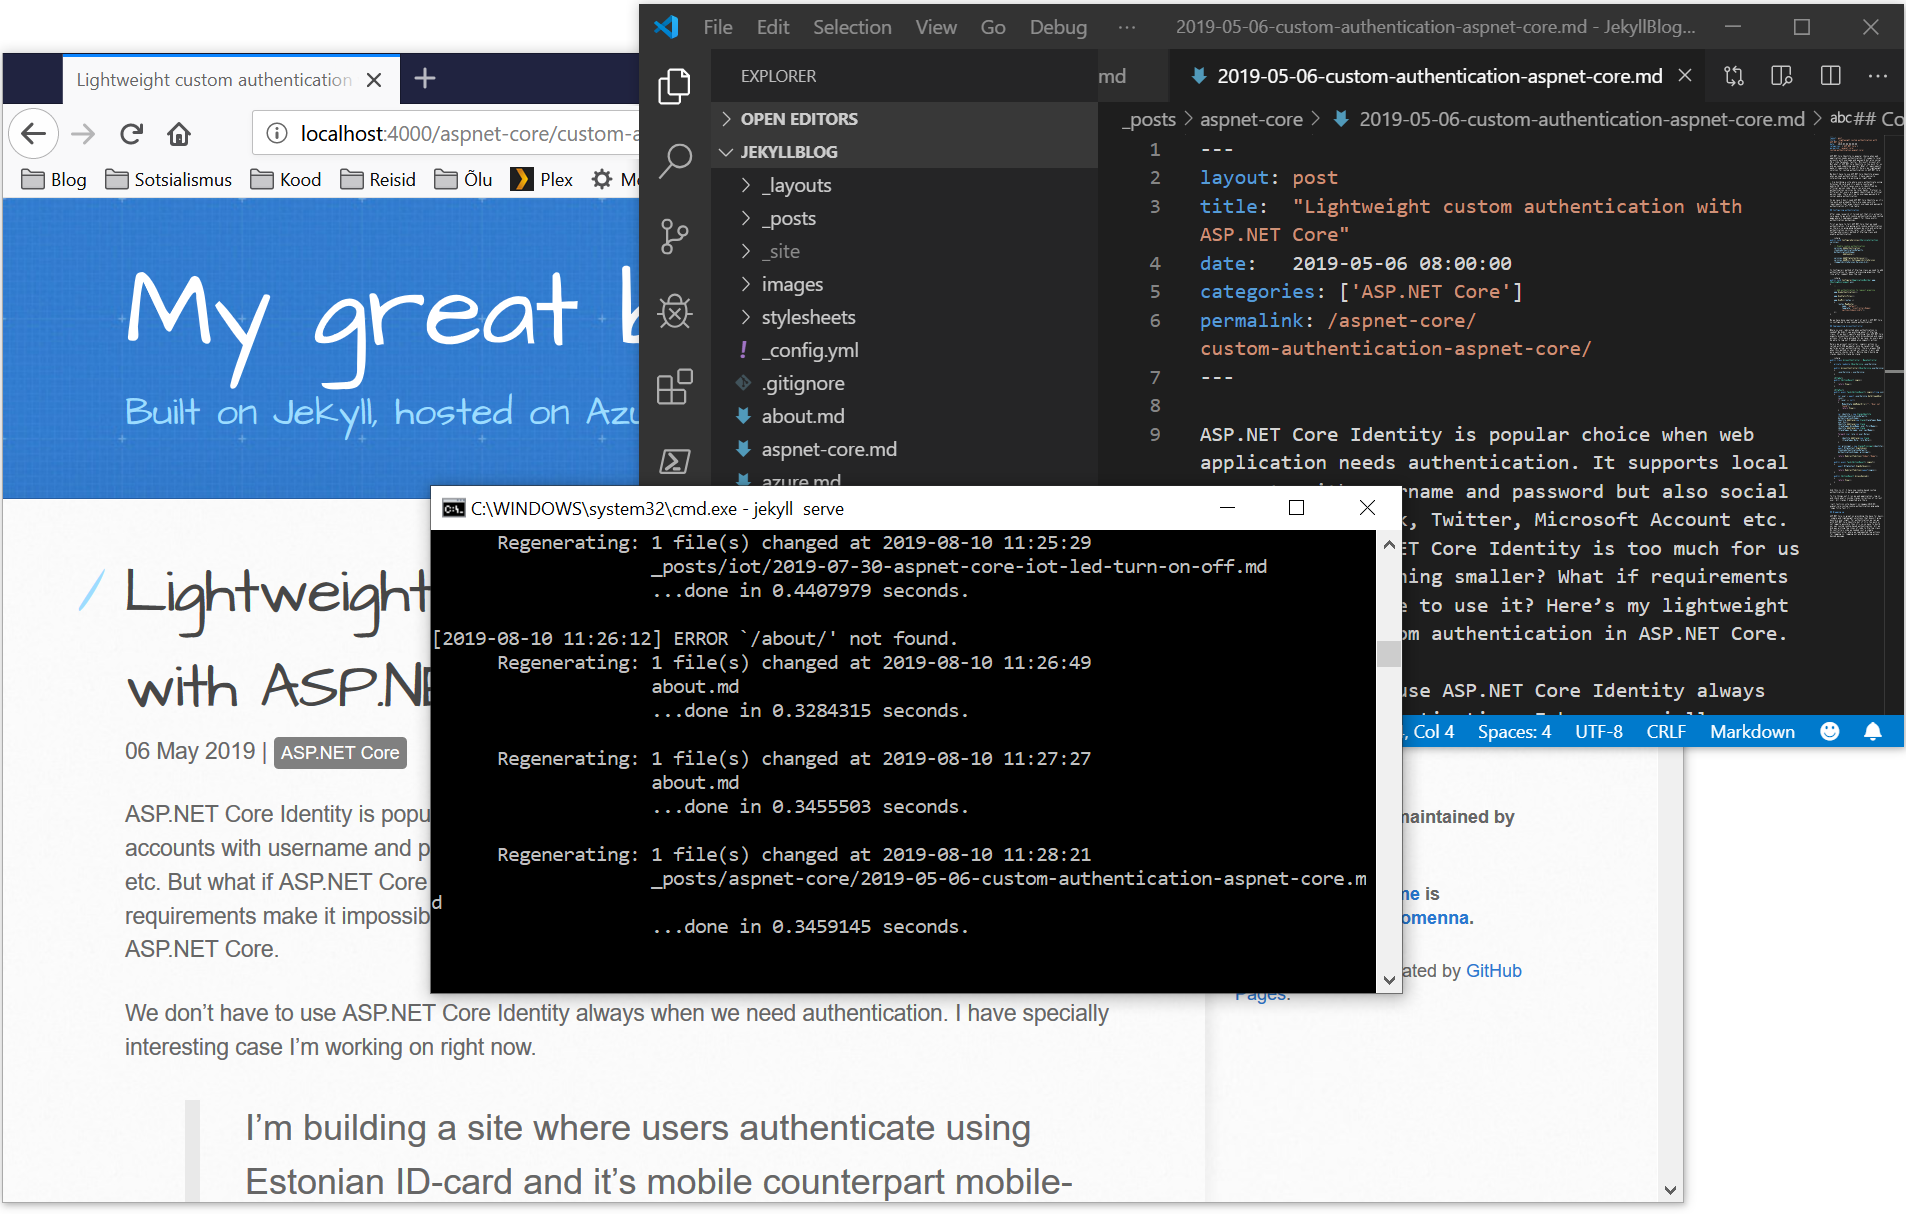
For short, this is how local writing process looks like.
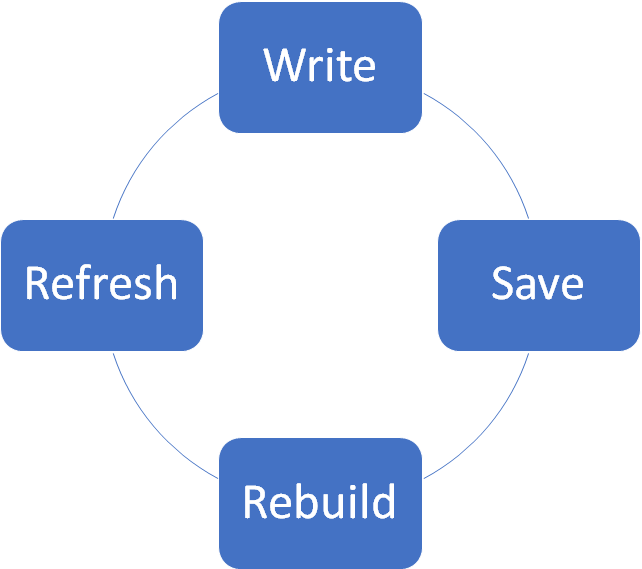
The process of writing contains following steps:
- Write and format your post or page in your favorite editor.
- Save changes.
- Rebuild happen automatically while Jekyll small web server is running (check the console window as errors are written there).
- Refresh page in browser to see changes.
If everything looks okay, it’s time to commit changes and merge draft branch to master.
Jekyll file system structure is pretty simple.
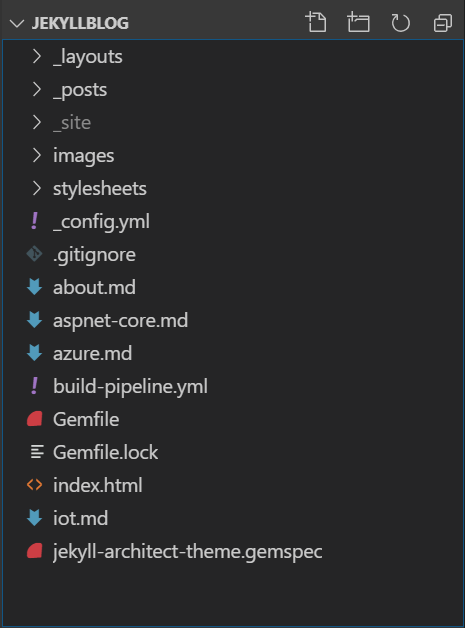
Here is the brief explanation.
- _layouts – this is the folder for layout files. Layouts are like master pages in ASP.NET Forms or layouts in ASP.NET MVC. Jekyll supports layouts inheritance meaning that one layout can be based on another.
- _posts – this folder is for blog posts. In our case blog posts are put to category folders to organize them better.
- _site – output folder where static site is built by Jekyll. This is the folder we will publish to Azure storage website later. Don’t change anything in this folder as your changes will be overwritten by Jekyll.
- images – not hard to guess – this folder contains images. In our case images are put to folder by year and month (/images/2019/08/ for August this year).
- stylesheets – probably doesn’t also need any comments.
- _congif.yml – configuration file for Jekyll.
- index.html – front page of static site.
At first place a little unused thing is first block in files. Surrounded by three hyphens (—) it is the block for post or page settings. In Jekyll lingo it is called Front Matter.
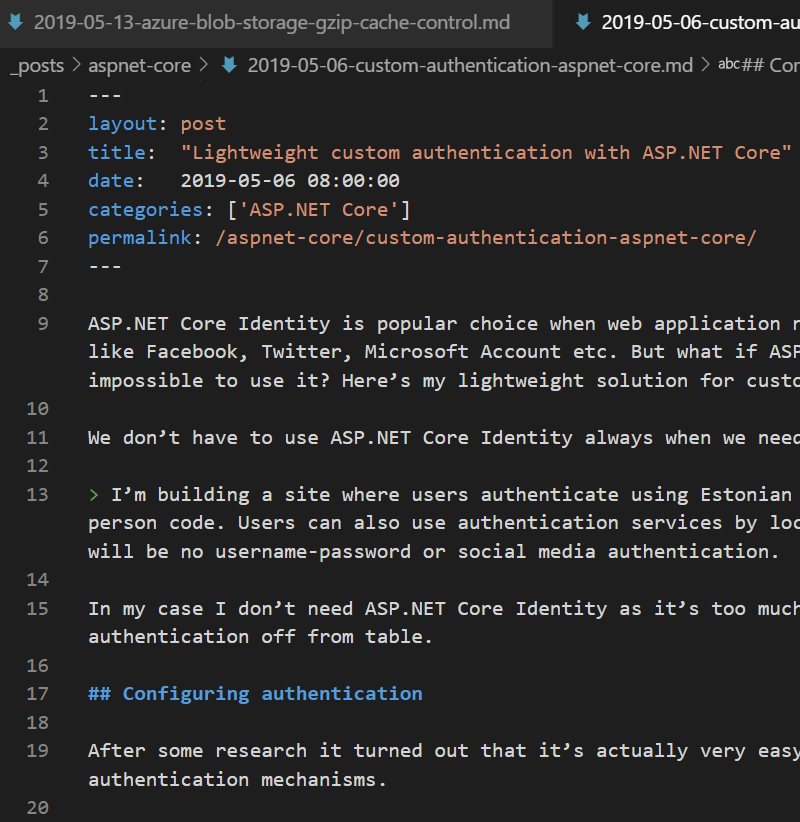
The blog post on screenshot above is written in markdown. It’s a markup language that is way cleaner than regular HTML. It’s easier to read and there are no mess of tags that make it hard to focus on text.
By Wikipedia markdown is a lightweight markup language with plain text formatting syntax. Its design allows it to be converted to many output formats, but the original tool by the same name only supports HTML.
After installing Ruby and Jekyll follow their step by step tutorial to get started with your first site.
If you already took sample site for this blog post then copy files to some folder, let it be demosite and open command line. Write there the following commands.
cd demosite
jekyll build
jekyll serve
Open browser and go to address http://localhost:4000/ to see how your site looks when published.
Wrapping up
For first post in series we got done more than expected. We have Jekyll installed and working on machine, we have all necessary tools installed, Azure DevOps and Azure accounts created. We have also first idea how to build sites on Jekyll and how to write serious articles on local box without need for internet. We can write blog posts now wherever we are with laptop. Be it train, airport or summer cottage. Publishing is simple – just commit and push to Git.





Comments are closed.