Beer IoT: Measuring temperature with Windows 10 IoT Core and Raspberry Pi
I have RaspberryPi 2 with Windows 10 IoT Core and I plan to use it for some brewing activities. In this blog post I introduce you how to measure temperature with RaspberryPi using DS18B20 thermal sensors. This post is also example about how easy it is to get started with your IoT stuff using Microsoft tooling.
- Beer IoT: Measuring temperature with Windows 10 IoT Core and Raspberry Pi
- Beer IoT: Moving to ITemperatureClient interface
- Beer IoT: Measuring cooling rate
- Beer IoT: Making cooling rate calculation testable
- Beer IoT: Estimating beer cooling time
- Beer IoT: Reporting measurements to Azure IoT Hub
- Beer IoT: Using Stream Analytics to save data from IoT Hub to SQL database
- Beer IoT: Visualizing sensors data using Power BI
- Beer IoT: Building Universal Windows Application to monitor cooling process
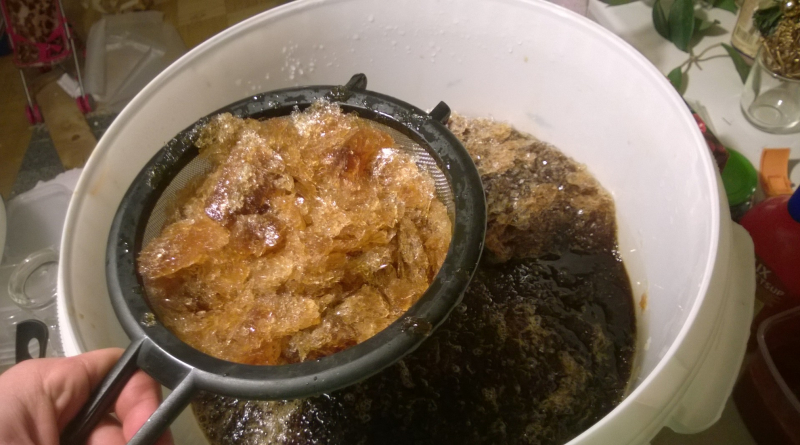
In practice I use this solution to monitor the freezing of eisbock beer. Making 20l of beer freeze takes time. Depending on weather outside it’s 10-18 hours. Using this solution I don’t have to open the bucket after every couple of hours to see if ice is coming and also I can estimate how long it takes for beer to freeze.
Update. Source code of my TemperatureStation solution is available at Github. The solution contains IoT background service and web application you can use right away. Readings are reported to MSSQL or Azure IoT Hub. Documentation is available at TemperatureStation wiki. Feel free to try out the solution.
Electronics
I don’t stop here on deep details of my solution. It’s pretty easy if you know at least something about electronics. For electronics part I used blog post Thermal sensor connected via I2C by Tomáš Greňo. It describes all stuff in great detail and if you are using Linux on RaspberryPi then you can find there everything you need to read temperatures.
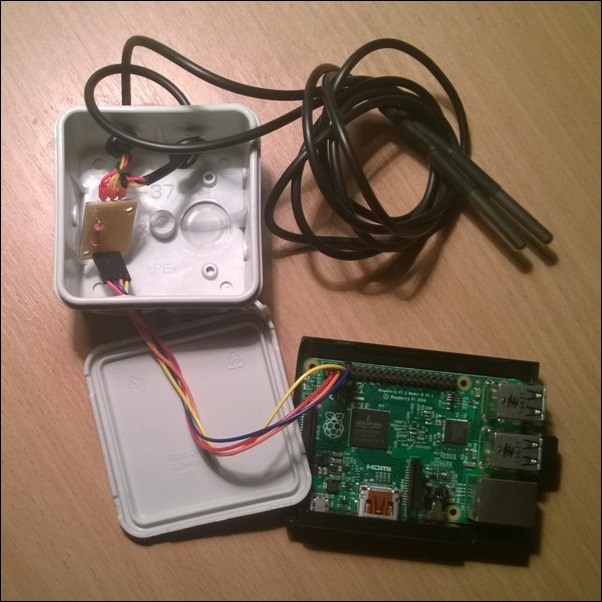
RaspberryPi 2 and two thermal sensors solution to control freezing of beer.
Solution is also ready for my conference trips and it survives travelling.
Some advice:
- All components used are cheap and I found these from local online electronic stores.
- DS2482S-100 and MS-DIP to SO-8 reduction are so small components that you better use right tools for such a small electronics or ask help from a friend who has tools and who knows how to use these.
- If you plan to connect more sensors to DS2482S-100 make sure the DS2482S-100 chip you buy supports the number of sensors you have.
- Colors of DS18B20 wires are described in component documentation.
- When connecting your solution to Raspberry make sure you connect wires to GPIO pins correctly.
- If possible then pack your sensor well so there’s not much chance you accidentally break it.
From this point on I assume you have your sensors solution done and connected to RaspberryPi. Also I assume you have development box running on Windows 10 and you have also Visual Studio with Universal Windows Applications and Windows 10 IoT templates installed.
Reading temperatures
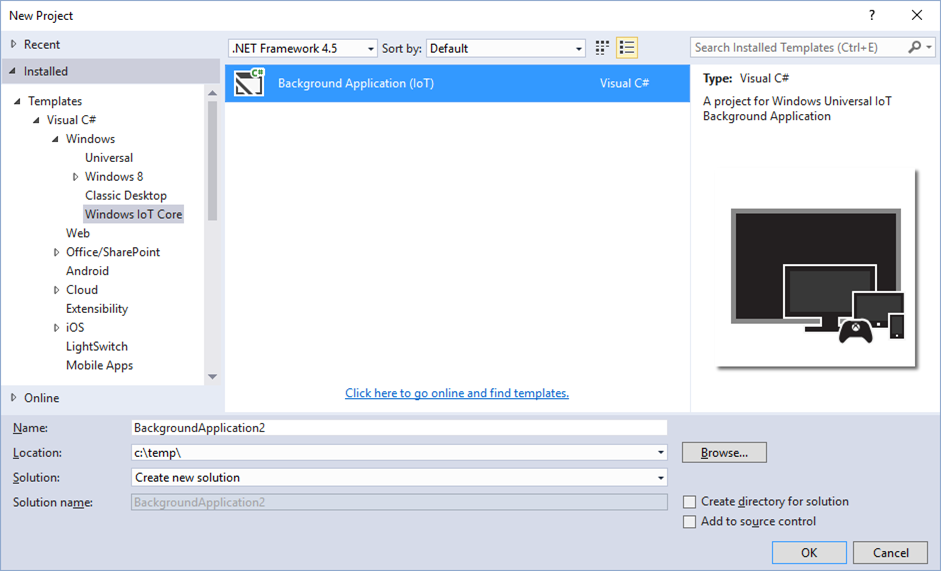
Run Visual Studio and create new IoT background application project.
When project is created open NuGet package manager and add Rinsen.OneWire package to your solution. Rinsen.OneWire is implementation of OneWire protocol by Fredrik Rinsén. It’s written in C# and it has built-in support for DS18B20 and DS18S20 sensors.
Now let’s write some code. In short we have to write something like this:
- When background application is run then initialize everything to read sensors.
- Add code for application shutdown so we leave application the polite way.
- Use timer to read values from sensors.
- Write values somewhere (debug window in our case).
Here’s the sample code for StartupTask class that Visual Studio creates automatically.
public sealed class StartupTask : IBackgroundTask
{
    private Timer _timer;
    private OneWireDeviceHandler _handler;
    private IEnumerable<DS18B20> _devices;
    private bool _isClosing = false;

    public void Run(IBackgroundTaskInstance taskInstance)
    {
        taskInstance.Canceled += TaskInstance_Canceled;

        _handler = new OneWireDeviceHandler(false, false);
        _devices = _handler.OneWireDevices.GetDevices<DS18B20>();
        _timer = new Timer(TemperatureCallback, null, 0, 5000);

        while (!_isClosing)
        {
            Task.Delay(2000).Wait();
        }
    }

    private void TemperatureCallback(object state)
    {
        var now = DateTime.Now;

        foreach (var device in _devices)
        {
            var result = device.GetTemperature();

            Debug.WriteLine(now + " " + device.OneWireAddressString +
                            ": " + result);
        }
    }

    private void TaskInstance_Canceled(IBackgroundTaskInstance sender,
                                       BackgroundTaskCancellationReason reason)
    {
        _isClosing = true;

        if (_timer != null)
        {
            _timer.Dispose();
            _timer = null;
        }

        if (_handler != null)
        {
            _handler.Dispose();
            _handler = null;
        }

        sender.GetDeferral().Complete();
    }
}
Build it, deploy it to RaspberryPi and run on Visual Studio. You should see output like this:
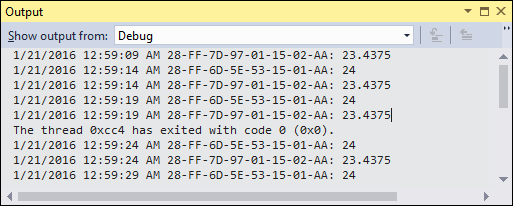
If you get the following error:
Exception thrown: 'System.IO.FileNotFoundException' in Rinsen.IoT.OneWire.dll
WinRT information: Slave address was not acknowledged.
then try to play with ad0 and ad1 arguments of OneWireDeviceHandler class. By default these boolean arguments are true. I had to set these to false to make my solution work.
Wrapping up
Windows 10 IoT Core and Visual Studio tooling make it very easy to build IoT solutions. Of course, we don’t away from problems so easy like we did right now as there are no libraries for everything we want to do but still we have very good tooling that makes development way easier. Although we wrote temperature readings to debug window we can go further and send the values to some database or Microsoft Azure service.



Nice project ! Kinda exactly what I’m trying to achieve.
Could you please provide the full diagram of your installation ?
I don’t understand how to wire the 2 temperature sensors.
Thank you!
Nevermind, I did stop reading Tomáš Greňo’s article at the Linux part.
Tomáš Greňo’s article provides all technical details. If you are like me and don’t know much about electronics then any of your friends with more knowledge about electronics can help you when looking at Tomáš Greňo’s article.
Thanks Gunnar, I have everything to start working… except this PCB adapter I just ordered of Ebay.
I tried to glue it to pin extension, but I only lost 2 hours trying…
In the mean time, I have time to work on the software part :)
Hi,
How many temperature sensors will this support?
I’m looking for some way of handling 6-8 temperature sensors.
Thanks,
Richie
32 or 64 sensors are supported. Can’t remember the correct number. For your case the same solution should work fine.
That’s just enough for my requirements then :D