Getting started with SharePoint Framework
I started learning SharePoint Framefork (SPFx) to get better on client-side development for Office 365. I decided to go with SharePoint Framework as it has simple lightweight tooling available and also because it is well documented. This blog post is short and practical introduction to SPFx and it brielfy summarizes everything important you need to know to get your first client-side web part up and running.
What is SharePoint Framework?
SharePoint Frameform is newest initiative by Microsoft to simplify client-side development on SharePoint. Cite from SPFx site:
SharePoint Framework, a Page and Part model enables fully supported client-side development for building SharePoint experiences, easy integration with the SharePoint data and support for open source tooling development.
We designed the SharePoint Framework to empower SharePoint developers both inside and outside Microsoft. Our engineers are building modern SharePoint experiences using the SharePoint Framework. You can use the same technology, tools and techniques we use to build more productive experiences and apps that are responsive and mobile-ready from day one.
SPFx is framework agnostic and it doesn’t need iframes to run. It means that we can use already loaded scripts and CSS-rules instead of loading them inside iframes again.
Tools
Here is the tooling you need to get started with sample client-side web part.
- Nodejs
- Gulp and yoman
- Visual Studio Code
- Chrome
- Chrome debugging extension for Visual Studio Code
You alse need some SharePoint subscription available (I’m developing mostly for Office 365 SharePoint these days).
Creating hello-world web part
To get started with your first client-side web part go throw the following steps:
- Open command line and move to directory where you want to create client-side web part project
- md helloworld-webpart
- cd helloworld-webpart
- yo @microsoft/sharepoint
- Reply all the questions that yoman generator asks
- Run Visual Studio code from this folder.
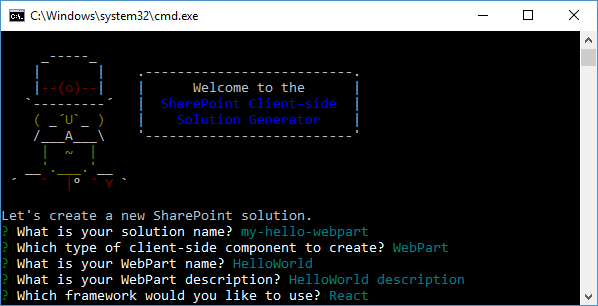
I created React.js based client-side web part. This is how it looks in Visual Studio Code.
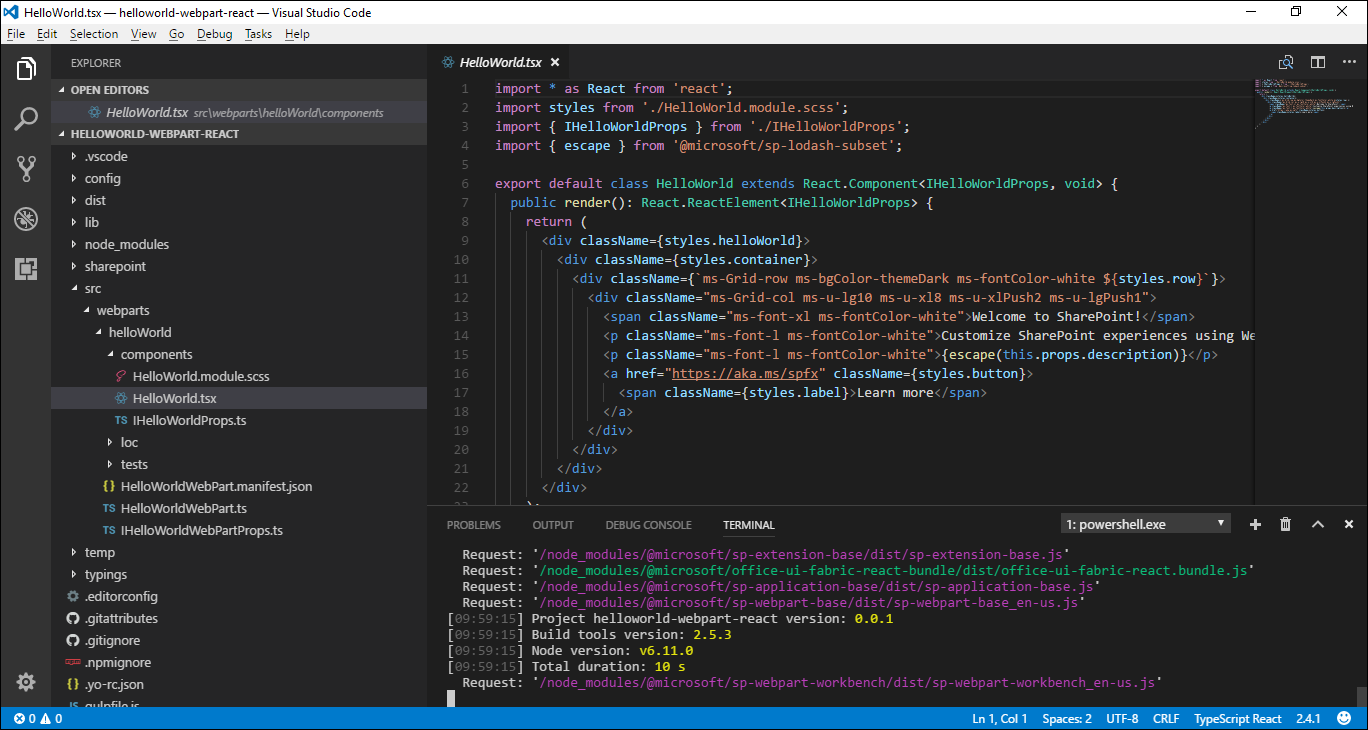
Client-side web part opened in Visual Studio Code.
Click on image to see it in original size.
I don’t cover here all configuration possibilities and the whole project structure but as you can see you need some skills on TypeScript as it helps you to avoid different type related errors and keep writing kind of object-oriented code.
Building client-side web part
There are three ways to build client-side web parts as shown on the following image.
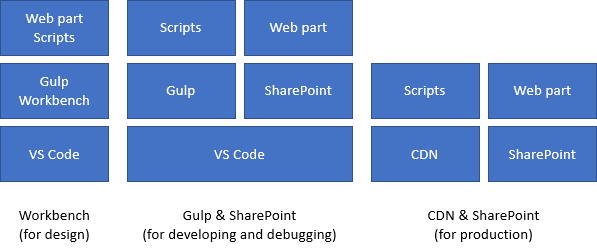
In brief, you have the following options.
- Workbench – this option is to test and build visual side of web part as SharePoint environment is not available with it. Of course, you can publish workbench to SharePoint site and use it also there.
- Gulp & SharePoint – client-side web part is installed to some SharePoint site but related scripts are loaded from local development server (running on Gulp). This is the best option to debug scripts.
- SharePoint and CDN – client-side web part is deployed to SharePoint and scripts are deployed to Azure blob storage of Office CDN. With this option there is no local debugging possible and you have to rely on browser tools only.
NB! With current tooling CDN doesn’t necessarily mean that Azure CDN service is needed. It’s possible to use Azure blob storage for scripts without Azure CDN. Read more about Azure deployment from SPFx document Deploy your SharePoint client-side web part to a CDN.
Which model is best for you depends on the situation but I am sure that you do most of scripting work using second option.
This is how our sample client-side web part looks like when running on workbench.
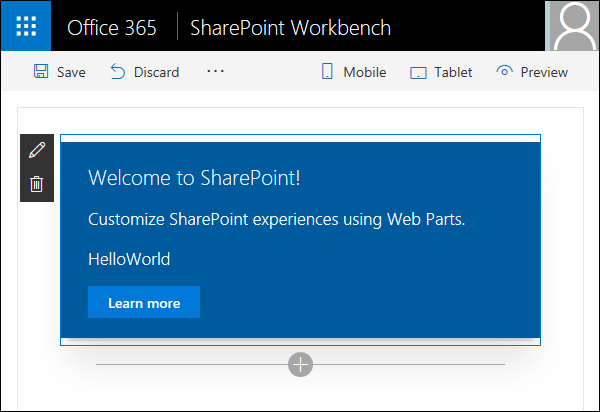
If you look at source of this page you will see that there is no iframes – web part is rendered to same page.
Important Gulp commands
The most important commands when working with Gulp are here:
- gulp serve – runs local gulp server and opens workbench page.
- gulp serve -nobrowse – runs local gulp server but doesn’t open browser,
- gulp package-solution – builds and packages web part for deployment to SharePoint using local URL-s for scripts.
- gulp package-solution –ship – build and packages web part for deployment to SharePoint and CDN.
- gulp deploy-azure-storage – deploys scripts to Azure blob storage (configuration is in file config/deploy-azure-storage.json).
If you need to upload the web part ot SharePoint then package the solution and take package from folder sharepoint/solution. Package is named by your project by default and it has .sppkg extension.
You can run these commands in Visual Studio Code terminal window (select View from top menu and then Integrated Terminal).
Wrapping up
If you are new to JavaScript for SharePoint and Visual Studio Code tooling then just take few days of time to get familiar with all the pieces in puzzle. It seems like too much at first sight but it is actually way easier than it seems. Tooling is stable and it is very well documented by Microsoft. You can start from SPFx document Build your first SharePoint client-side web part and then move to next document where example continues. I had also no issues when deploying web part to SharePoint. As SPFx comes with many benefits and tooling is already stable, it’s time to dig deeper and start learning it.

