Controlling LifeCam Cinema on Raspberry Pi
After some Windows 10 IoT Core updates I discovered that it detected LifeCam Cinema camera connected to it. I tried it also few months ago but then Windows 10 IoT Core was not able to detect it. To find out if and how it works I wrote a primitive UWP application that shows picture from camera and saves photos made using webcam.
Here is the nice evidence of support for LifeCam Cinema. I found it from Windows 10 IoT Core Device Portal. Here it is.
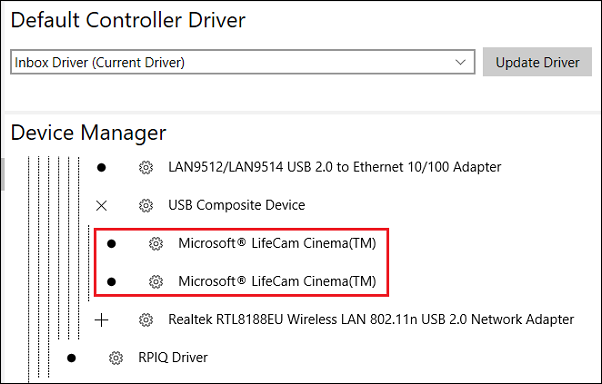
LifeCam Cinema is shown as two devices probably because it comes with microphone.
Displaying camera picture
I found some good materials by Jeremy Lindsay that helped me complete the task:
- How to use the camera on your device with C# in a UWP application: Part #1, previewing the output
- How to use a Microsoft LifeCam Studio with the Raspberry Pi 3 using C# and Windows 10 IoT Core
Multi-platform. The code gicen here is UWP one and it runs also on desktop PC and Windows Phone. I’m just targeting Raspberry Pi here as I’m trying to build something on it.
Let’s start with simple XAML page to show picture from camera. For this there is CaptureElement called PreviewControl.
<Page
    x:Class="UwpCam.MainPage"
    xmlns="http://schemas.microsoft.com/winfx/2006/xaml/presentation"
    xmlns:x="http://schemas.microsoft.com/winfx/2006/xaml"
    xmlns:local="using:UwpCam"
    xmlns:d="http://schemas.microsoft.com/expression/blend/2008"
    xmlns:mc="http://schemas.openxmlformats.org/markup-compatibility/2006"
    mc:Ignorable="d">

    <Grid Background="{ThemeResource ApplicationPageBackgroundThemeBrush}">
        <CaptureElement Name="PreviewControl" Stretch="Uniform" />
    </Grid>
</Page>
To make controlling of camera easier there is Magellanic.Camera NuGet package added to project. Full code behind the page is here.
public sealed partial class MainPage : Page
{
    public MainPage()
    {
        this.InitializeComponent();

        Application.Current.Resuming += Application_Resuming;
        Application.Current.Suspending += Application_Suspending;
    }

    protected override async void OnNavigatedTo(NavigationEventArgs e)
    {
        await InitialiseCameraPreview();
    }

    private async void Application_Resuming(object sender, object o)
    {
        await InitialiseCameraPreview();
    }

    protected override void OnNavigatedFrom(NavigationEventArgs e)
    {
        _cameraDevice.Dispose();
    }

    private void Application_Suspending(object sender, SuspendingEventArgs e)
    {
        _cameraDevice.Dispose();
    }

    private CameraDevice _cameraDevice = new CameraDevice();

    private async Task InitialiseCameraPreview()
    {
        await _cameraDevice.InitialiseCameraAsync(await GetCamera());

        var viewFinder = _cameraDevice.ViewFinder;

        PreviewControl.Source = viewFinder;

        await viewFinder.StartPreviewAsync();
    }

    private async Task<DeviceInformation> GetCamera()
    {
        var rearCamera = await _cameraDevice.GetCameraAtPanelLocation(Windows.Devices.Enumeration.Panel.Back);
        var defaultCamera = await _cameraDevice.GetDefaultCamera();

        return rearCamera ?? defaultCamera;
    }
}
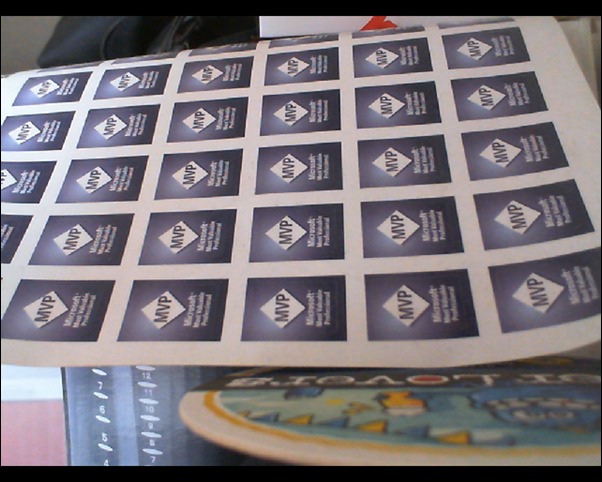
When I run this application on my Raspberry then this is what it shows on screen.
It has poor resolution for some reason but at least it works. Quick check shows that there is no support for automated video control features (yet?) but it is possible to set manually many properties like focus, brightness, hue etc.
Taking photo with webcam
To make one step further with my experiments I modified the code above to take a photo and save it to default user folder. The code is simple and illustrative but it works.
private async Task InitialiseCameraPreview()
{
    await _cameraDevice.InitialiseCameraAsync(await GetCamera());

    var viewFinder = _cameraDevice.ViewFinder;

    var lowLagCapture = await viewFinder.PrepareLowLagPhotoCaptureAsync(ImageEncodingProperties.CreateUncompressed(MediaPixelFormat.Bgra8));
    var capturedPhoto = await lowLagCapture.CaptureAsync();
    var softwareBitmap = capturedPhoto.Frame.SoftwareBitmap;
    await lowLagCapture.FinishAsync();

    var myPictures = await StorageLibrary.GetLibraryAsync(KnownLibraryId.Pictures);
    var file = await myPictures.SaveFolder.CreateFileAsync("photo.jpg", CreationCollisionOption.GenerateUniqueName);
    SaveSoftwareBitmapToFile(softwareBitmap, file);
    softwareBitmap.Dispose();
}

private async void SaveSoftwareBitmapToFile(SoftwareBitmap softwareBitmap, StorageFile outputFile)
{
    using (IRandomAccessStream stream = await outputFile.OpenAsync(FileAccessMode.ReadWrite))
    {
        var encoder = await BitmapEncoder.CreateAsync(BitmapEncoder.JpegEncoderId, stream);

        encoder.SetSoftwareBitmap(softwareBitmap);
        encoder.BitmapTransform.ScaledWidth = 1240;
        encoder.BitmapTransform.ScaledHeight = 960;
        encoder.BitmapTransform.Rotation = BitmapRotation.Clockwise90Degrees;
        encoder.BitmapTransform.InterpolationMode = BitmapInterpolationMode.Cubic;
        encoder.IsThumbnailGenerated = true;

        try
        {
            await encoder.FlushAsync();
        }
        catch (Exception err)
        {
            switch (err.HResult)
            {
                case unchecked((int)0x88982F81): //WINCODEC_ERR_UNSUPPORTEDOPERATION
                                                    // If the encoder does not support writing a thumbnail, then try again
                                                    // but disable thumbnail generation.
                    encoder.IsThumbnailGenerated = false;
                    break;
                default:
                    throw err;
            }
        }

        if (encoder.IsThumbnailGenerated == false)
        {
            await encoder.FlushAsync();
        }
    }
}
After running application few times there are the following files in default user pictures folder.
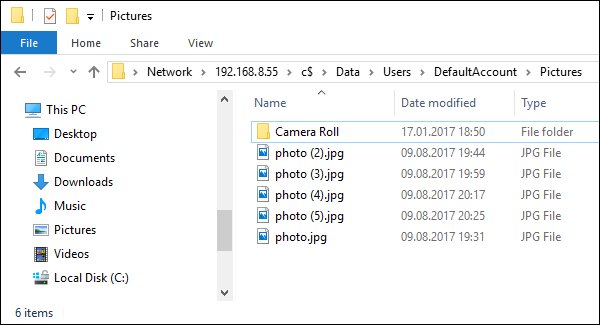
For web developers the code above doesn’t look very familiar due to different classes we don’t see everyday at work but it’s actually very simple and logical after going through UWP documentation.
Wrapping up
Windows 10 IoT Core is getting better and better on supporting different peripherals and ability to use webcam opens a new front for applications that can run on micro computers. Using webcam is easy. There are packages available in NuGet to simplify webcam related tasks and we can use same UWP API-s as with desktop and mobile applications. Although Raspberry Pi is not built with photo or video processing in mind there are still situations where we can benefit from it.





Comments are closed.