Deploying independent web applications to Windows Azure using single web role
I found very good blog post by Andy Cross’ Blog where he describes how to deploy multiple web sites in a single Windows Azure web role. I like the idea but there are some things that should be understood and done differently if you plan to use same web role for totally different web applications that you want to run on your Windows Azure instance. In this posting I will show you how to deploy independent web applications to Windows Azure instance using single web role.
Problems with independent sites
If your sites are in same solution or they are related to each other then use the solution than Andy Cross provides. But if you want to run different sites on same Windows Azure instance you have some things to consider first:
- Adding different sites to same solution is not good idea because sites can belong to different projects maintained by different people.
- Usually code is kept in source code repository and you don’t want to have files of one project in folder of other.
- You don’t always want to build all sites together and then publish them to cloud again.
Having these considerations in mind we can go step further from Andy’s solution.
Using special deployment project for same server sites

Image on right shows my folder structure:
- AzurePublishing – this is solution folder,
- DummyRole – this is dummy web role mentioned before (I was not able to modify cloud project so it doesn’t have reference to some project in solution),
- MsdnAzureDeploy – this folder contains cloud deployment project,
- packages – this is created by Visual Studio, I left it there,
- Publish – root folder for web applications that are deployed with web role,
- www.example.com – publishing folders for web sites you want to deploy to server.
Every web site has its own folder under Publish folder and you can use Visual Studio web application publishing to publish web site files to correct subfolders.

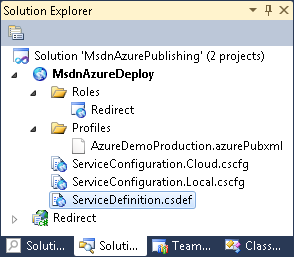
Expecting that your cloud project is set up correctly and you can deploy dummy site with no problems, we can take the next step and modify our service definition.
We have to add our publishing folders to service definition manually. Each web application folder is separate site in our case.
Here is the example content for service definition file:
<?xml version="1.0" encoding="utf-8"?>
<ServiceDefinition name="MsdnAzureDeploy" xmlns="http://schemas.microsoft.com/ServiceHosting/2008/10/ServiceDefinition">
  <WebRole name="Redirect" vmsize="Small">
    <Sites>
      <Site name="Web">
        <Bindings>
          <Binding name="Endpoint1" endpointName="Endpoint1" />
        </Bindings>
      </Site>
      <Site name="Ex1" physicalDirectory="..\Publish\www.example1.com">
        <Bindings>
          <Binding name="Endpoint1" endpointName="Endpoint1"
              hostHeader="www.example1.com" />
        </Bindings>
      </Site>
      <Site name="Ex2" physicalDirectory="..\Publish\www.example2.com">
        <Bindings>
          <Binding name="Endpoint1" endpointName="Endpoint1"
              hostHeader="www.example2.com" />
        </Bindings>
      </Site>
    </Sites>
    <Endpoints>
      <InputEndpoint name="Endpoint1" protocol="http" port="80" />
    </Endpoints>
    <Imports>
      <Import moduleName="Diagnostics" />
      <Import moduleName="RemoteAccess" />
      <Import moduleName="RemoteForwarder" />
    </Imports>
  </WebRole>
</ServiceDefinition>
Some things to note:
- our end-point is port 80 (HTTP)
- dummy web app has no host header specified and it is accessible from <something>.cloudapp.net,
- our two example web applications have host headers specified and during deployment IIS will be automatically configured so addresses point to correct applications (you have to make CNAME records in your domain keeper site),
- publishing folders location are relative to deployment project folder.
Make sure you have all paths correctly specified and try to deploy your cloud solution to Windows Azure. If your deployment succeeds then try to access your sites by URL-s you gave in service definition file and make sure everything works normally.
Conclusion
Although multiple web roles on same server are not supported by Windows Azure we can gather our sites under same web role and publish them all together. The solution shown here is not perfect but it works. Be careful with deployments and make sure your deployment packages contain always the versions that are allowed to be published. Also make your deployments to test instance first, test everything and then put your test instance to production.


